Basic setup
- Open LS Central and select Voyado Interaction Setup.
- The following panel will open. All the settings for your Voyado integration are collected here.

- Selecting Actions in the top left will bring up a few useful options.
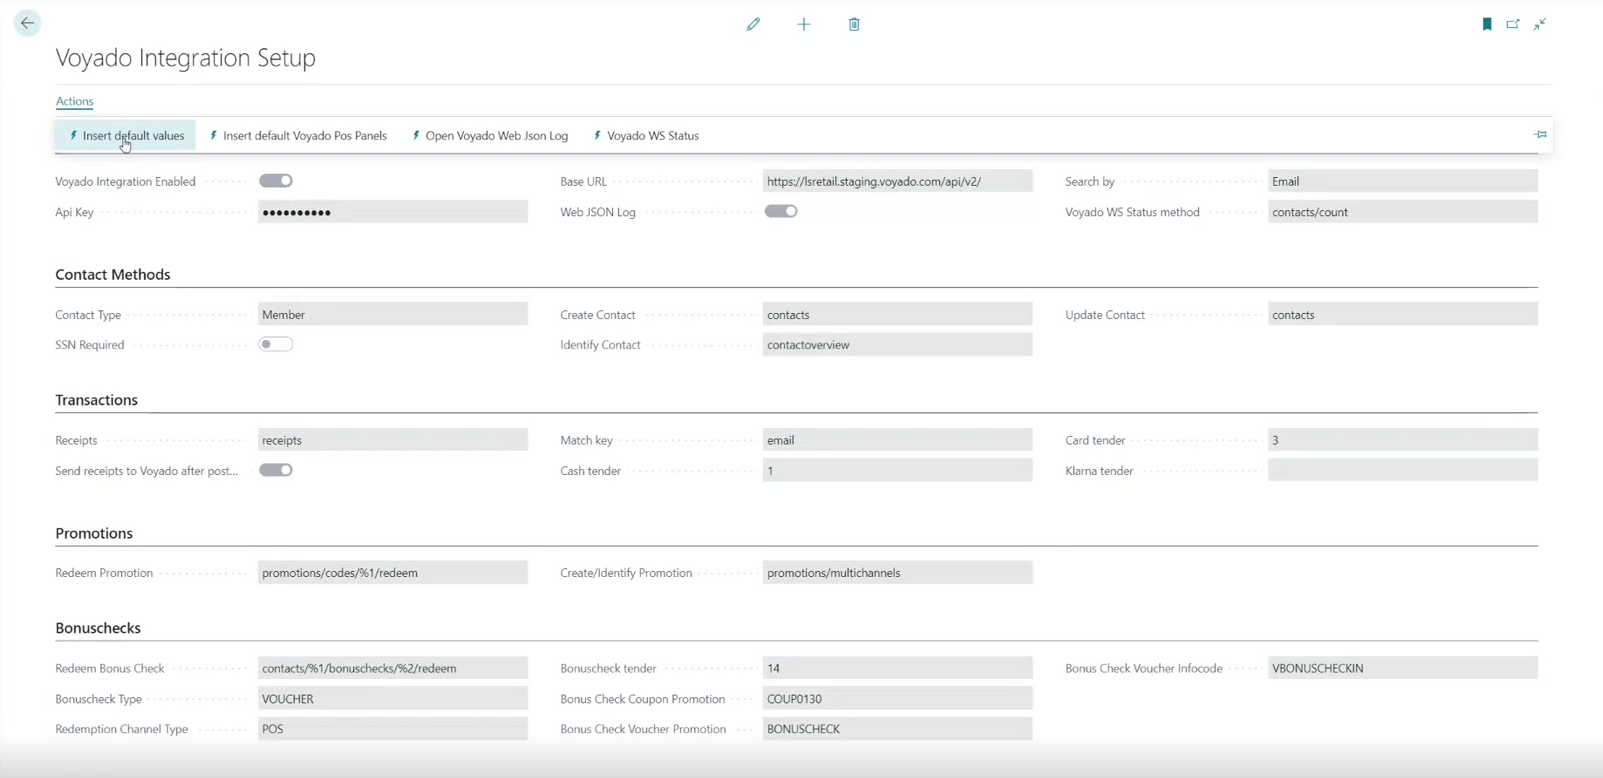
- “Insert Default Values” in the top left will populate the fields with default values to get you started.
- “Voyado WS Status” is a quick way to confirm that communication between LS Central and Voyado Engage has been set up correctly and is working. It requires that you have filled in the following data under General:
- API Key
- Base URL
- Voyado WS Status method (contacts/count)
- “Open Voyado Web Json Log” opens the log showing you all the communication between LS Central and Voyado Engage. Here you can examine requests made, methods executed, payloads sent, request status etc.
- “Insert default Voyado POS Panels” creates the POS panels you’ll need to use the integration.
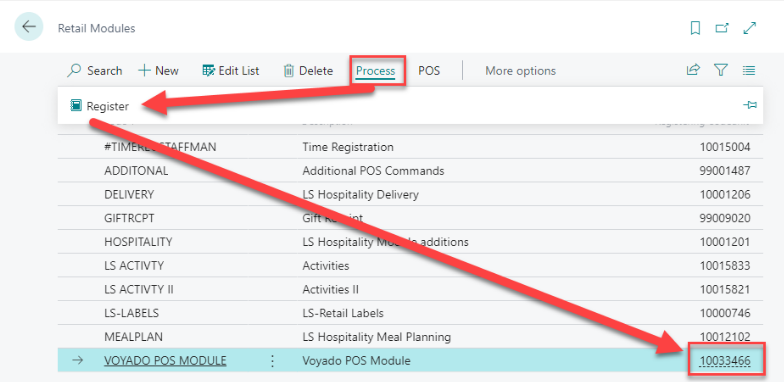
Voyado POS module
In LS Central, go to Retail Modules. On the list you’ll find the VOYADO POS MODULE (codeunit 10033466). Install it as you would any other module.