Bonus checks
Bonus checks, unlike Promotions, are always created first in Voyado Engage. They are then imported into LS Central whenever needed and used to create data entries using the template Voyado Bonuschecks found under POS Data Entry types. These can then be applied to transactions in the normal way.Setting up bonus checks
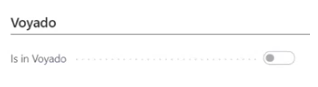
In your Voyado Integration Setup there are two options under Bonus checks / Bonus check type and these are VOUCHER and COUPON.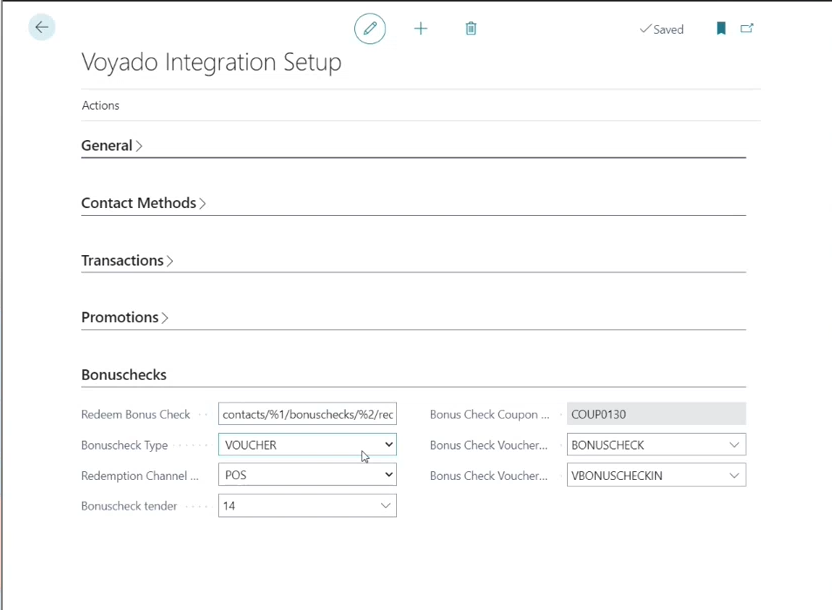
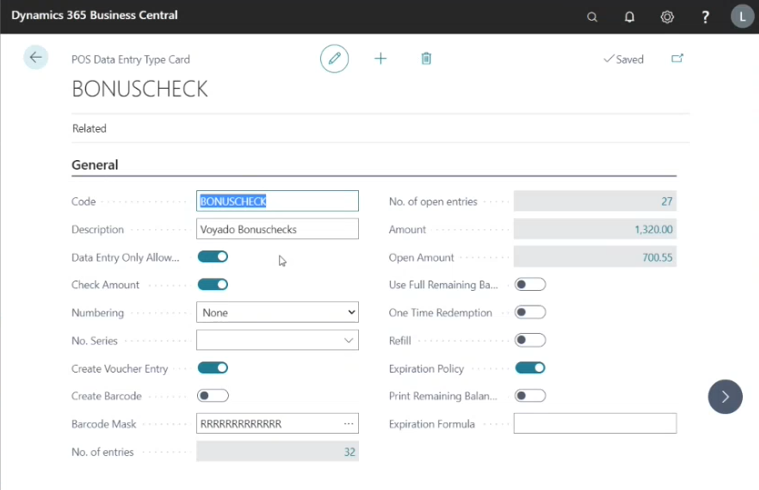
Bonus checks template
In LS Central, go to POS Data Entry Types. There you should see Voyado Bonushecks listed as a type. This is the template used by LS Central to create bonus checks.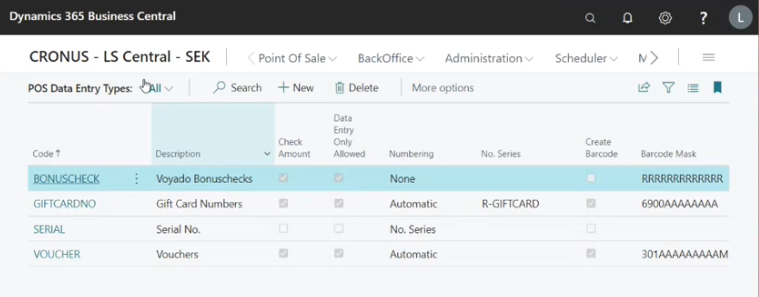
Using a bonus check
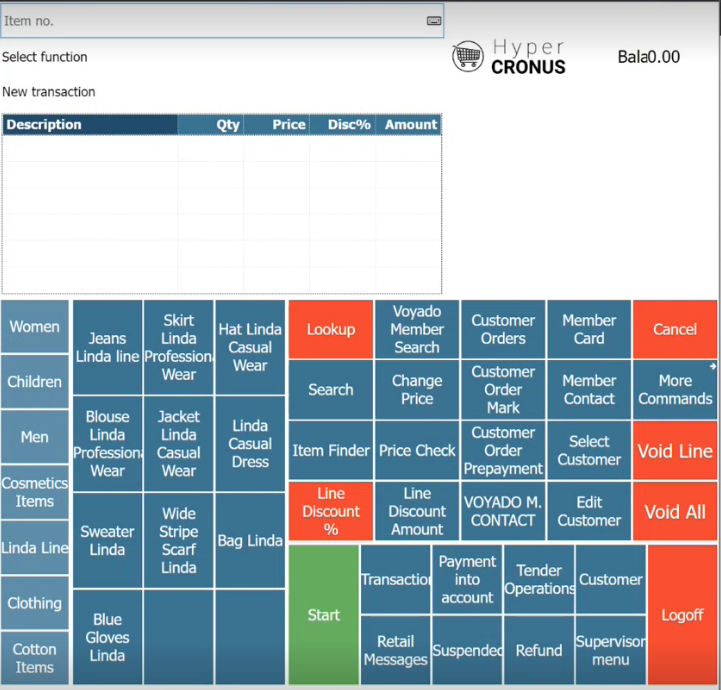
When a member is identified in the POS, LS Central checks if that member already has data entries of type Voyado Bonuscheck. If there are, these will first be deleted. A sync will then be performed with Engage to fetch any bonus checks and new data entries will be created in the LS Central. Bonus checks are thus created on-the-fly whenever a member is identified in the POS (and deleted after). To see the bonus checks available for a member, select Voyado Bonuschecks in the POS (which uses the new command VOYADOMEMBERBONUS). You will see something like this: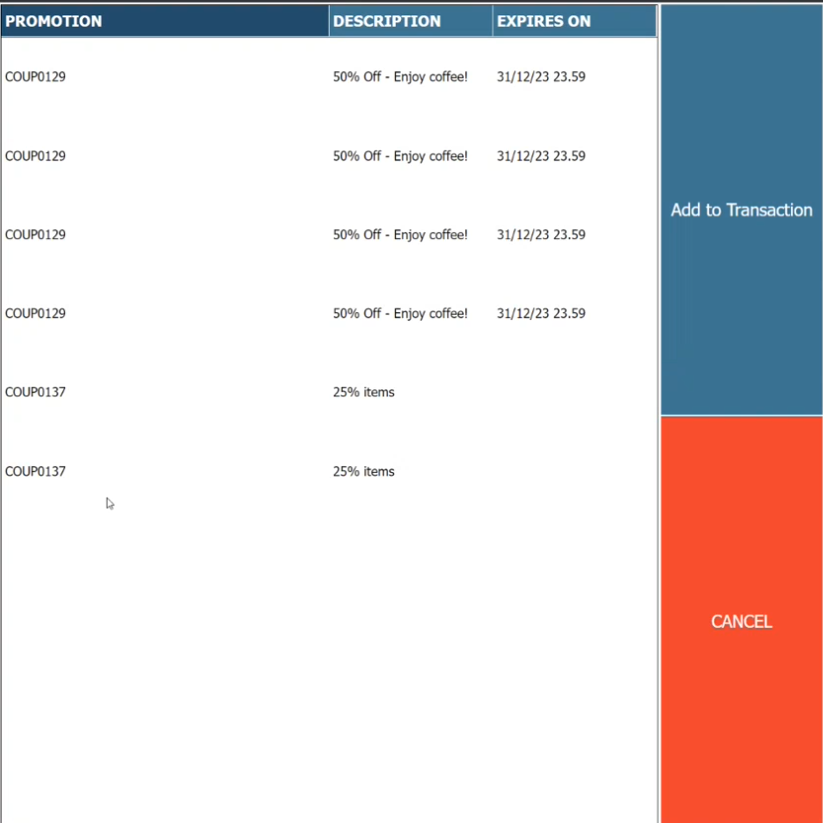
Bonus check states
Engage and LS Central use different naming conventions for the current state of bonus checks. Natively in Engage, a bonus check’s state can be either Used or Unused. When an Engage-created bonus check is imported and viewed in LS Central, the states shown (in the column Voyado Status) are REDEEMED and UNUSED:- Used in Engage = REDEEMED in LS Central
- Unused in Engage = UNUSED in LS Central
Promotions
A Promotion is first created as a Store Coupon in LS Central. This data is then sent over to Voyado with the press of a button, where it’s used to create a matching Voyado Promotion. Here are the steps to follow:Creating a store coupon
Go to Store Coupon List in LS Central and create a Store Coupon. Check that the details are filled out as in the example below: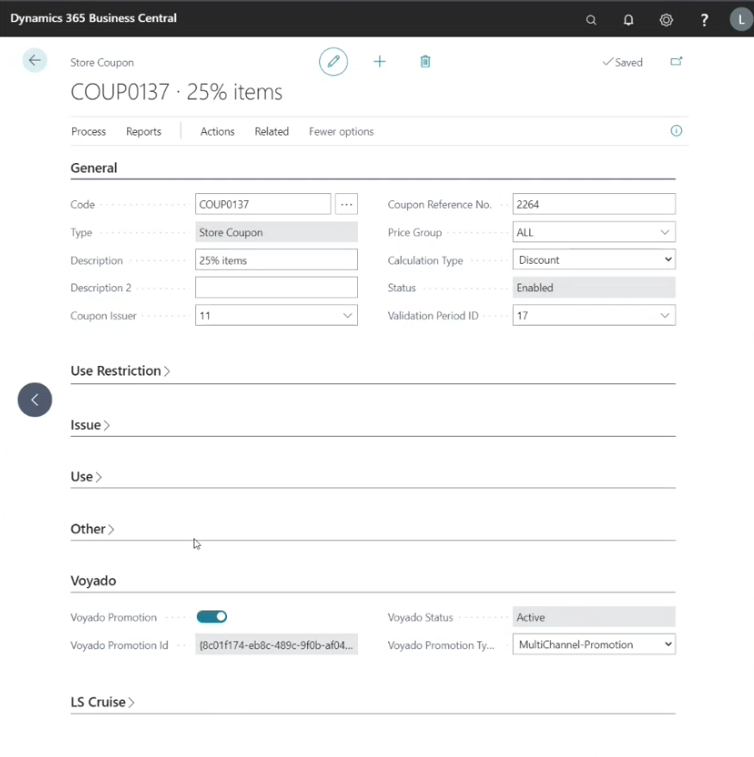
General tab
General tab
- Code: The id of the campaign
- Description: A short description
- Coupon Issuer: Who is the coupon issuer
- Coupon Reference No.: The reference id
- Price Group: The price group that will be applied.
- Calculation Type: This must be set to Discount
- Validation Period ID: Validation period for the campaign
- Status: Enabled/Disabled
Use restriction tab
Use restriction tab
Here you define which items will be part of the campaign, as you would do for any Store Coupon.
Issue tab
Issue tab
- Calculation Type: Discount
- Discount Type: Discount %
- Value: The discount percentage that will be applied.
- Barcode Mask: Barcode mask (already set up)
Use tab
Use tab
- Handling: Discount
- Entry Validation: Apply to Entry
- Coupon ID Method: Serial No.
- Member Type: Club
- Member Value: The id of the club
Voyado tab
Voyado tab
- Voyado Promotion: Enabled/Disabled
- Voyado Promotion Type: Multichannel-Promotion
Creating promotion in Engage
When your Store Coupon is set up, go to the top menu in LS Central. Select Actions and then Create Promotion In Voyado.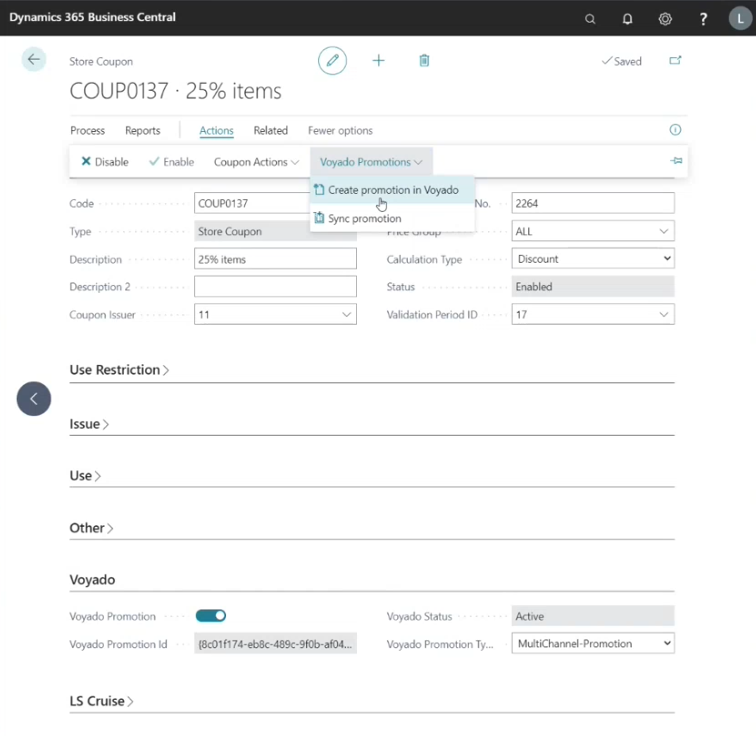
Using promotion in-store
Once a customer is identified in the POS, select the button Voyado Promotions (which uses the new command VODAYOMEMBERPROMOS). LS Central will then receive all the active promotions for this member and confirm that each one:- Was created in LS Central
- Is currently enabled in LS Central
Using a promotion online
Assuming the Can be used online option has been ticked for the Promotion in Voyado Engage, it should now be usable with online purchases.Creating and redeeming promotions
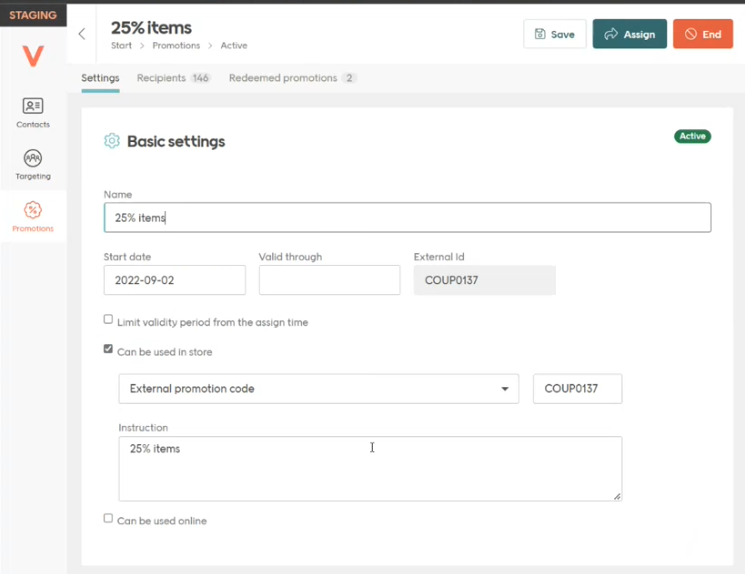
To ensure that promotions are created and redeemed correctly, be sure that the Promotions section of your Voyado Integration Setup looks like this.
Transactions
All transactions, both purchases and returns, are sent on-the-fly from LS Central to Voyado Engage. Engage runs a background process to read in new data, so there might be a slight delay before receipts turn up in the Engage frontend. In LS Central transaction receipts can be found in the Transaction Register. Receipts in Engage can be found under a contact’s Transaction History.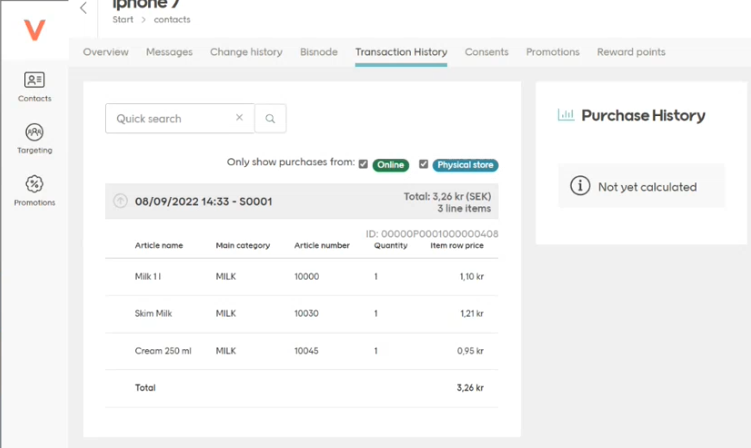
Missing receipts
Each transaction creates a receipt in LS Central’s Transaction Register. An individual receipt looks like this.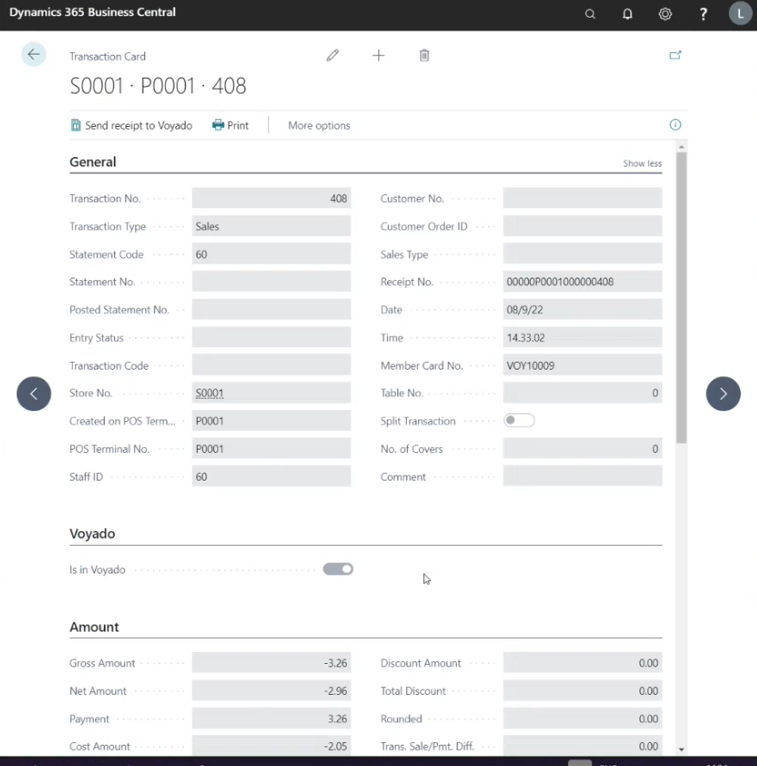
Handling returns
Returns also turn up under a contact’s Transaction History in Engage. In the example here, the topmost transaction is a return. They can be manually sent in the same way as other transactions, if needed. Note that a return transaction’s Total is negative.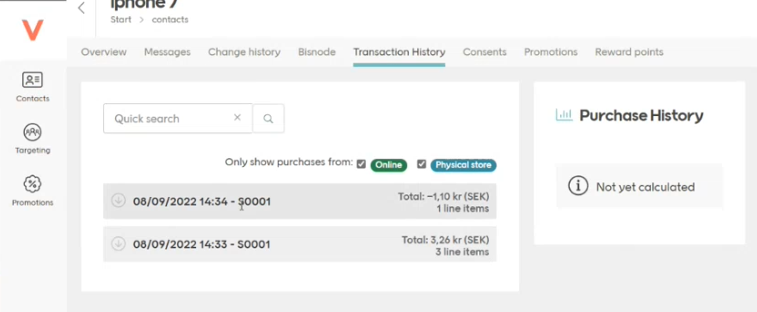
Contacts
Voyado is the owner of all contacts. This means that any changes made to a contact in the POS will always be synced up to Voyado Engage. Likewise, contact data will always be fetched from Engage before it is shown on the POS.Voyado Member Search
Installing the VOYADO POS MODULE added a new search panel to the POS: the Voyado Member Search. This uses the attribute specified in Voyado Integration Setup / General to search for a member. The attribute used can be Email, Mobile Phone No or SSN (to be added down the line) and the attribute you’ve chosen is shown on the panel’s name (in this case, Email).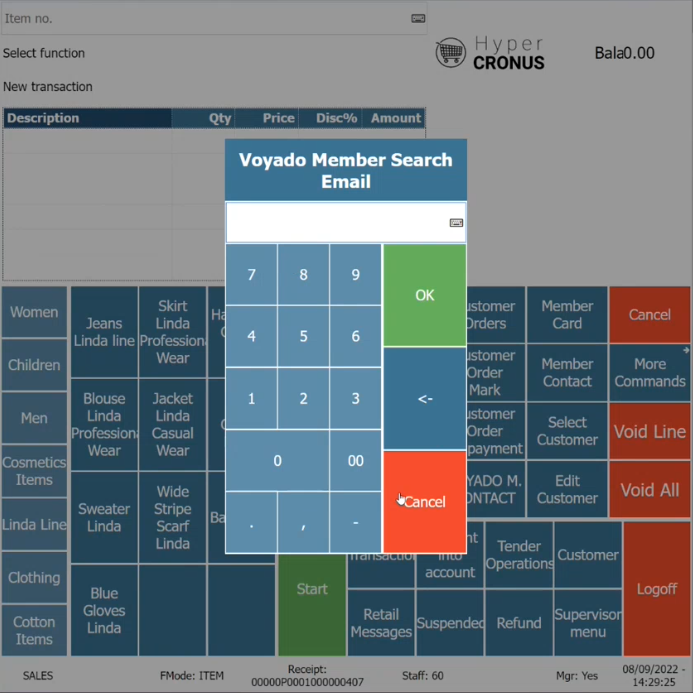
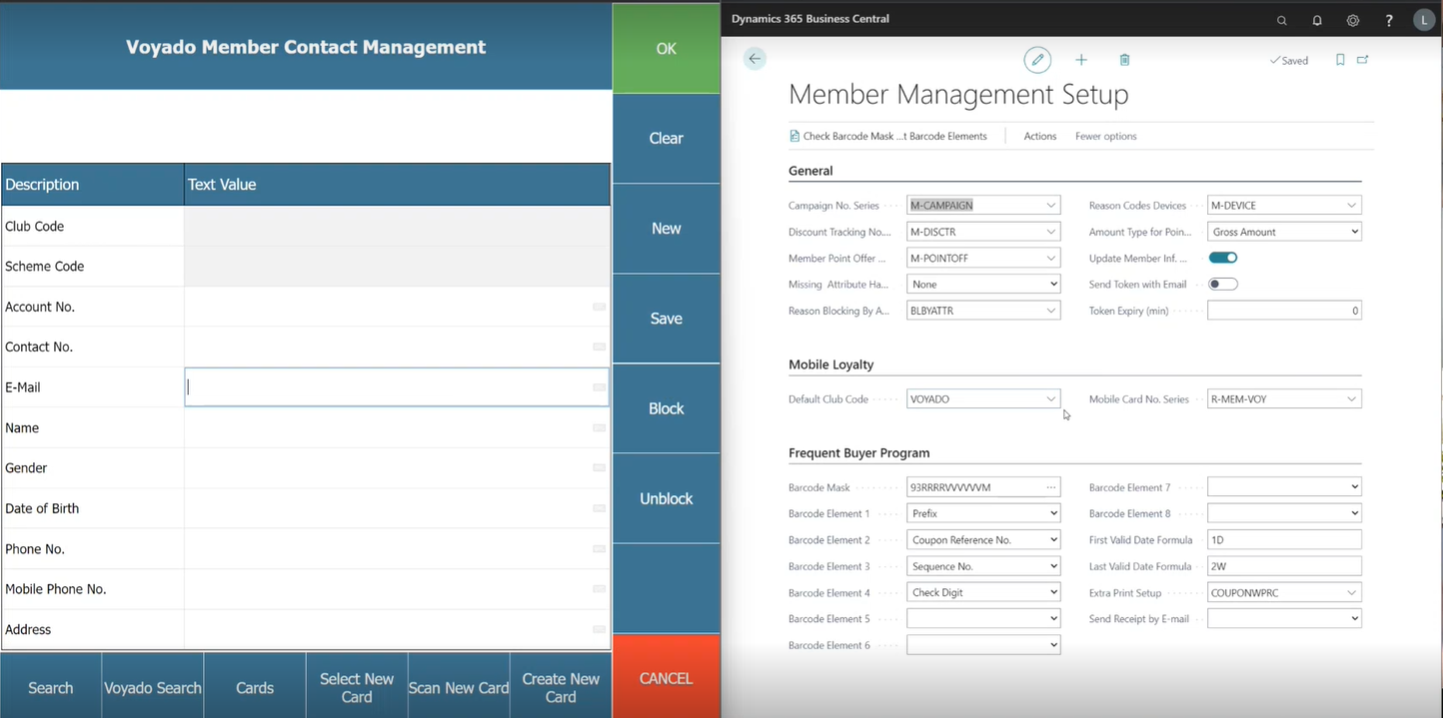
Member Management Panel
This panel can be opened either by a Voyado Member Search or manually with the button VOYADO M. CONTACT on the POS (which uses the new command VOYADOMEMBERCONTACT).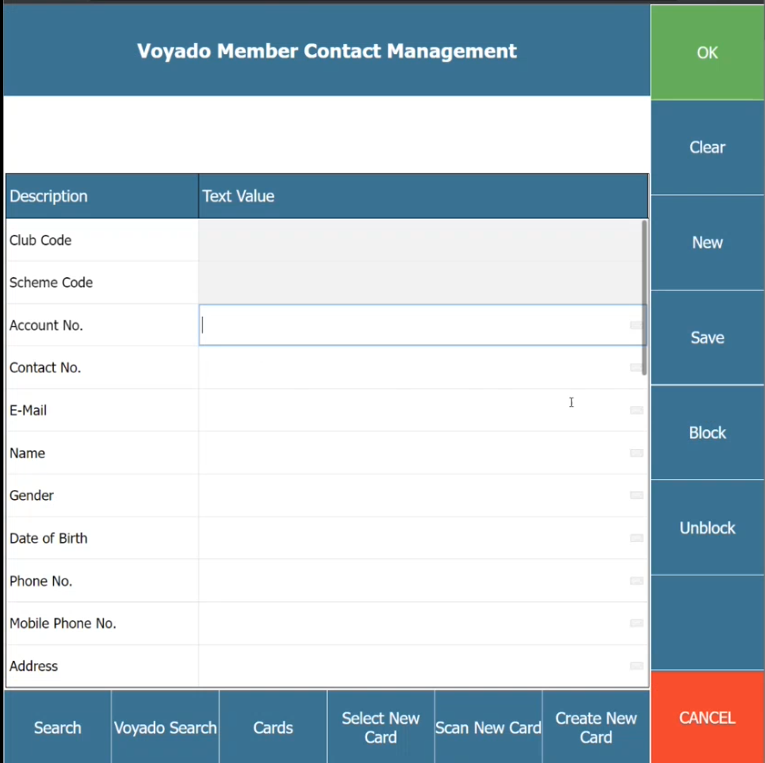
1. The member does not exist
1. The member does not exist
If the member cannot be found in LS Central or in Voyado, no data will be returned. The user can then create a member for this customer directly on the POS.Email and Name are mandatory fields when creating new members (LS Central requires them both). So if you have a customer’s Mobile Phone Number but not their email, just write in a fake email instead (along with Name and Mobile Phone Number) and LS Central will accept it. This fake email does not have to be unique.This is the sequence to create a new member:
- Enter Name and Email and any other data such as Mobile Phone No
- Select SAVE
2. The member only exists in Engage
2. The member only exists in Engage
This could happen, for example, if the member created their account online and has never used the POS. If a search is made for a member like this, data from Voyado will be populated in the panel. However, Club Code, Scheme Code, Account No. and Contact No. will be empty.Select SAVE and the member will be automatically created in LS Central (and any additional data will also be synced to Voyado).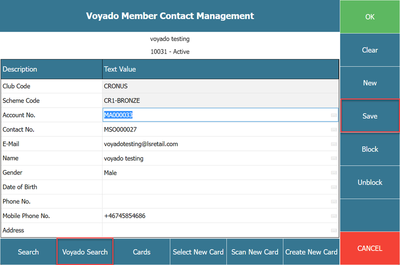
3. The member exists in both systems
3. The member exists in both systems
In this case, you will get all the member’s information and can choose to update it (for example, perhaps the person has changed name). Again, selecting SAVE will automatically sync any such changes to Voyado.
Things to keep in mind
- If a new member’s country code is not specified, the country code for the store will be used by default, since Engage requires a country code to be sent.
- In LS Central there are no controls about a member’s phone prefix, but Engage requires a correct prefix. It is important for the POS user to enter the prefix correctly.
New POS commands
The VOYADO POS MODULE comes with several new commands:- VOYADOMEMBERBONUS: See a Voyado member’s bonus checks
- VOYADOMEMBERCONTACT: See a Voyado member’s contact info
- VOYADOMEMBERPROMOS: See a Voyado member’s promotions
- VOYADOMEMBERSEARCH: Search for a Voyado member by phone, email, SSN
- VOYADOSEARCHPHONE: Search a Voyado member by phone
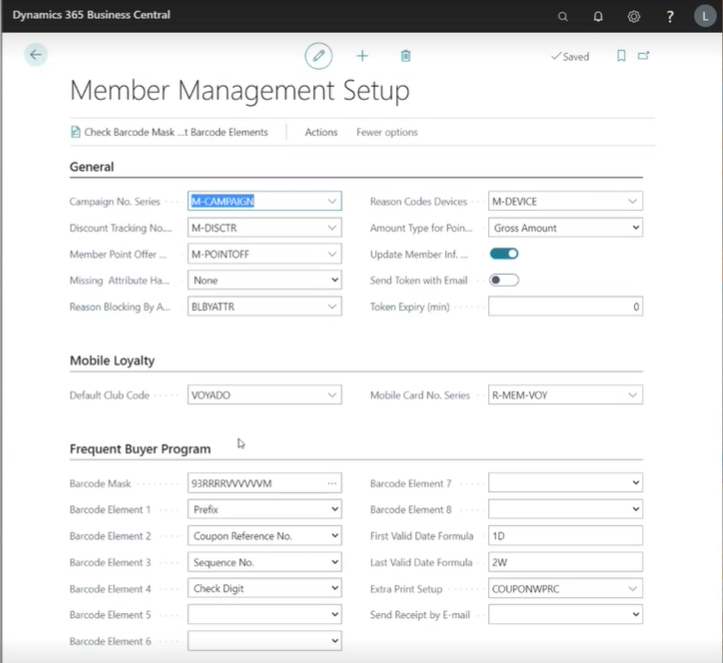
Member management setup
Voyado must be chosen as the Default Club Code under Member Management Setup in LS Central. If it is not, you cannot save changes to a contact from the EPOS.