1 - Install the app
In Shopify Admin, go to Apps → Shopify App Store.- Search for Voyado Engage.
- Click Add app and complete the installation.
You already have an Engage account
You already have an Engage account
- In the app’s first screen, choose I already have an account.
- Voyado might need to enable Shopify support for you. Contact your Voyado team.
- When that is done, proceed to step 2.
You don't yet have an Engage account
You don't yet have an Engage account
- In the app onboarding, fill in Company name and Company number (or equivalent).
- Hit Submit. Voyado will now contact you to create the account.
- Once your Engage account is ready, re-open the app and select I already have an account.
- Now proceed to step 2.
2 - Connect Shopify to Engage
In Shopify, open Apps → Voyado Engage → Settings.Voyado API Domain
Under Engage account connection, fill in Voyado API Domain:- Production:
https://[tenant].voyado.com - Staging:
https://[tenant].staging.voyado.com
[tenant] with your Engage tenant name.
Voyado API Key
Generate this in Config Hub inside your Engage environment (API key for the Shopify app).- Click Connect.
- Verify that a confirmation panel appears showing the connected Engage URL.
Changing environment
If you need to change which Engage environment your Shopify app is connected to, you can:- Go to Settings and then Disconnect
- Enter a new API Domain and API Key
- Press Connect again
3 - Map countries to stores
Now you will map your countries in Shopify to stores in Engage. The store -> country mapping determines which Engage store that each Shopify customer and order belongs to. This is critical for segmentation and reporting. To do this:- In Shopify, open Voyado Engage → Settings → Voyado Store to Country Mapping.
- Click Add mapping.
- For Mapping type, choose Shipping country.
- For Voyado Store, pick the Engage store (type
ECOMM) which will handle that shipping country. - For Shipping country, select the corresponding country from Shopify.
- Repeat these steps for each market you sell to.
- Set a Rest of the world fallback store (mandatory) for customers with unmapped or missing country.

4 - Contact synchronization
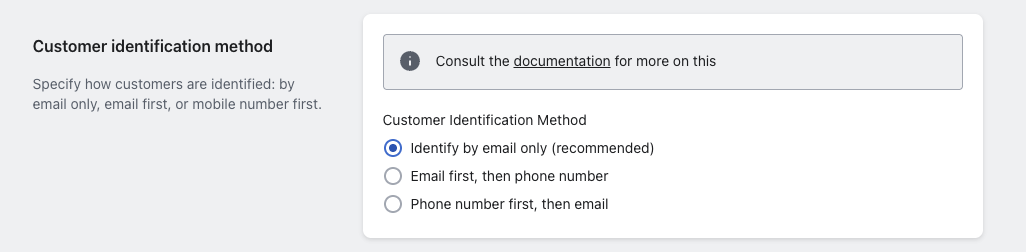
Now you will determine how customers from Shopify are created as contacts in Engage. Open Voyado Engage → Settings → Contact synchronization in the app.Identification method
Pick Customer identification method:- Identify by email only (recommended) - lookups only by email (this is unique in Engage).
- Email first, then phone number - only if you’re okay with the risk of non-unique phone numbers.
- Phone number first, then email - the least recommended option.
Contact type
Choose Customer contact type:- Create everyone as Member (recommended) - Ths means all Shopify customers will be stored as Members in Engage.
- Both Contact and Member - Not recommended with Shopify’s New Customer Accounts, because all new customers will effectively end up as Contacts.

5 - Orders to receipts
This determines when orders in Shopify will be sent to Engage to become transactions / receipts. Do this:- In the Voyado Engage app, go to Settings → Receipt sync stage (wording may vary slightly).
- Choose when an order should be stored as a Receipt in Engage, either:
- When Order is Unfulfilled
- When Order is Fulfilled.

6 - Order notifications
This determines how transactional emails are sent from Engage.- In Engage, prepare your automation workflows and email templates for:
- Order confirmation
- Order shipped / partially shipped
- Order cancelled
- Order refunded
- In Shopify, for Shopify Plus stores, disable Shopify’s native transactional emails (where allowed) so customers don’t get duplicates.
- In the Voyado app Settings, enable Order notifications (name might vary slightly) so Shopify events trigger Engage automations with mapped order data.

7 - Back in stock sync
This keeps the inventory levels synced from Shopify to Engage, allowing back-in-stock functionality to work.Prerequisites
Before you start configuring this in Shopify, make sure the following are in place in Engage:- Product feed connected and active - Your Shopify product feed must be imported into Engage and updating regularly.
- Back in stock module enabled - The Back-in-Stock feature must be activated in the Engage tenant.
- Back in stock email/SMS template ready - There is at least one template (usually email) that can be used for the notification.
- All relevant products exist in the feed - If a product isn’t in the feed, Voyado can’t send Back-in-Stock notifications for it.
If any of these are missing, it’s vital that you fix them first (this is usually done together with your Voyado CSM or implementation team).
Inventory Sync
Do this in the Shopify app:- In Shopify Admin, go to Apps → Voyado Engage.
- Open the app and go to Settings.
- Find the toggle for Inventory Sync and turn it “ON”.
- Make sure the locations that handle online orders are included in the stock levels that are synced (meaning, the same locations Shopify uses for your online store).

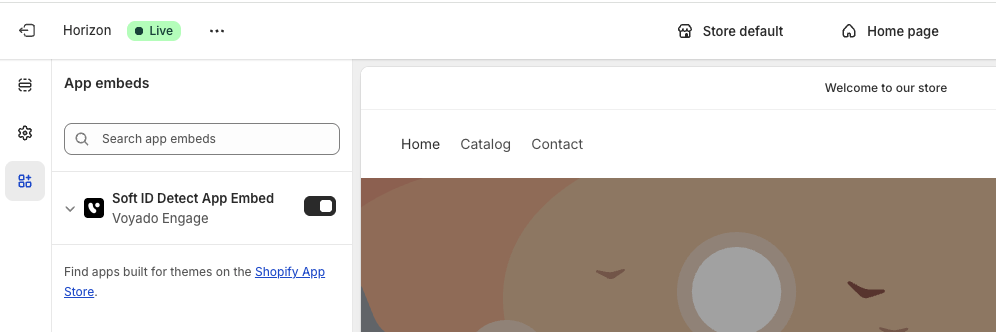
8 - Soft ID Detect App Embed
To enable this in Shopify:- In Shopify Admin, go to Apps → Voyado Engage.
- Click View app embed
- In the App Embed view, enable the toggle:
- Soft ID Detect App Embed
- Click Save in the top right corner.
9 - Soft ID decrypt key
Here you’ll configure the soft identification decrypt key. This key is required for Shopify to decrypt the identifier coming from Engage-generated email links.- Login to Voyado Engage.
- Go to Administration -> Configure Engage
- Open Soft identification section
- Copy the Encryption key (for the correct environment, usually production)
- Go back to Shopify admin -> Apps -> Voyado Engage
- Paste the key into Soft identification decrypt key

10 - Web pixel tracking
Web pixel tracking is used in abandoned cart, abandoned browse and products of interest. Before you start configuring this in Shopify, make sure the following are in place in Engage:- Your Product feed must be imported into Engage and updated regularly
- The Soft ID Detect App Embed must be active (see step 8 above for details)
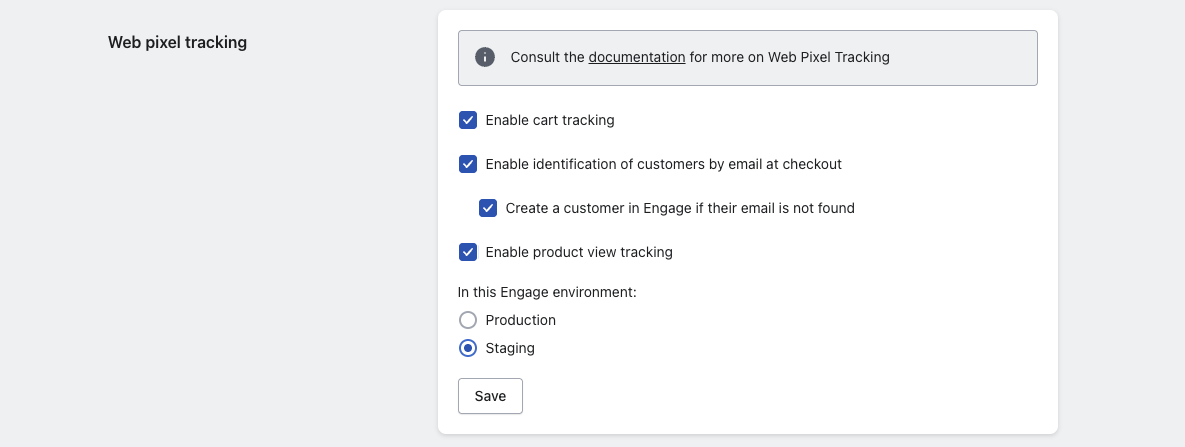
- In Shopify, open Voyado Engage → Settings → Web Pixel Tracking.
- Enable Enable cart tracking for abandoned cart flows.
- Enable Enable identification of customers by email at checkout (and also Create a customer in Engage if their email is not found if you want auto-creation to function).
- Enable Enable product view tracking for products of interest / abandoned browse.
- Confirm that the environment configured (production or staging) matches your Engage API domain.
11 - Loyalty & promotions
Now you will decide how loyalty and promotions are shown in the storefront by configuring theme blocks and checkout appearance.App theme block
- In Shopify Admin, open Voyado Engage and select Customize theme in the app.
- In the Theme Editor, click Add section → Apps → Voyado
- Insert the Loyalty / Promotions block where you want it (for example, My account).
- Now save the theme.
Vouchers & promotions
In Shopify:- Go to Voyado Engage → Settings
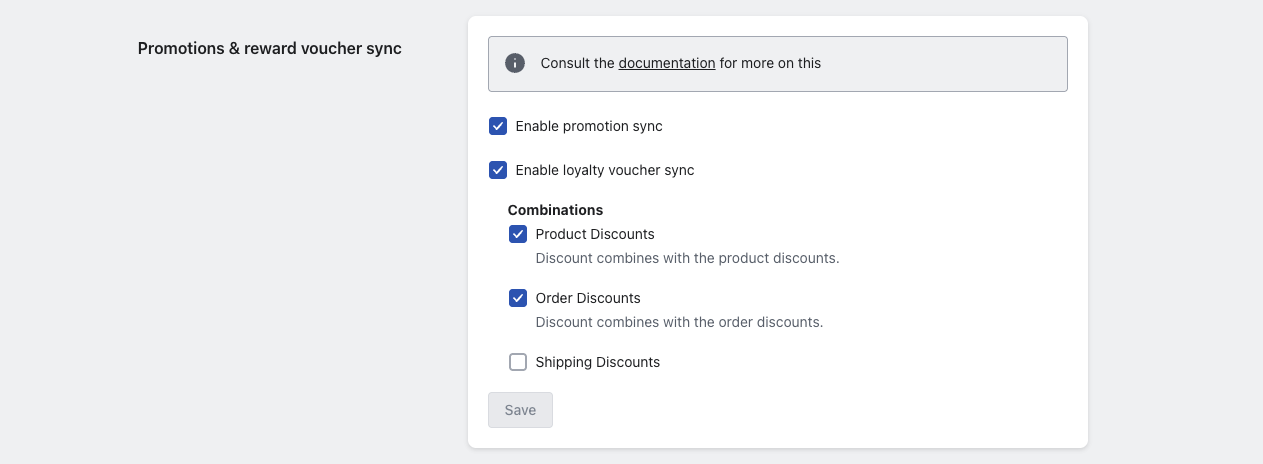
- Enable Promotion sync (for multichannel promotions from Engage)
- Enable Loyalty voucher sync (for reward vouchers from Engage)
- Enable Combination options and choose whether a voucher can be combined with:
- Product discounts
- Order discounts
- Free shipping discounts
- Set up Reward vouchers (from points) as needed.
- For promotions, make sure the External promotion code exactly matches a discount code in Shopify
Learn about vouchers in Engage
Learn about promotions in Engage
Loyalty checkout extension
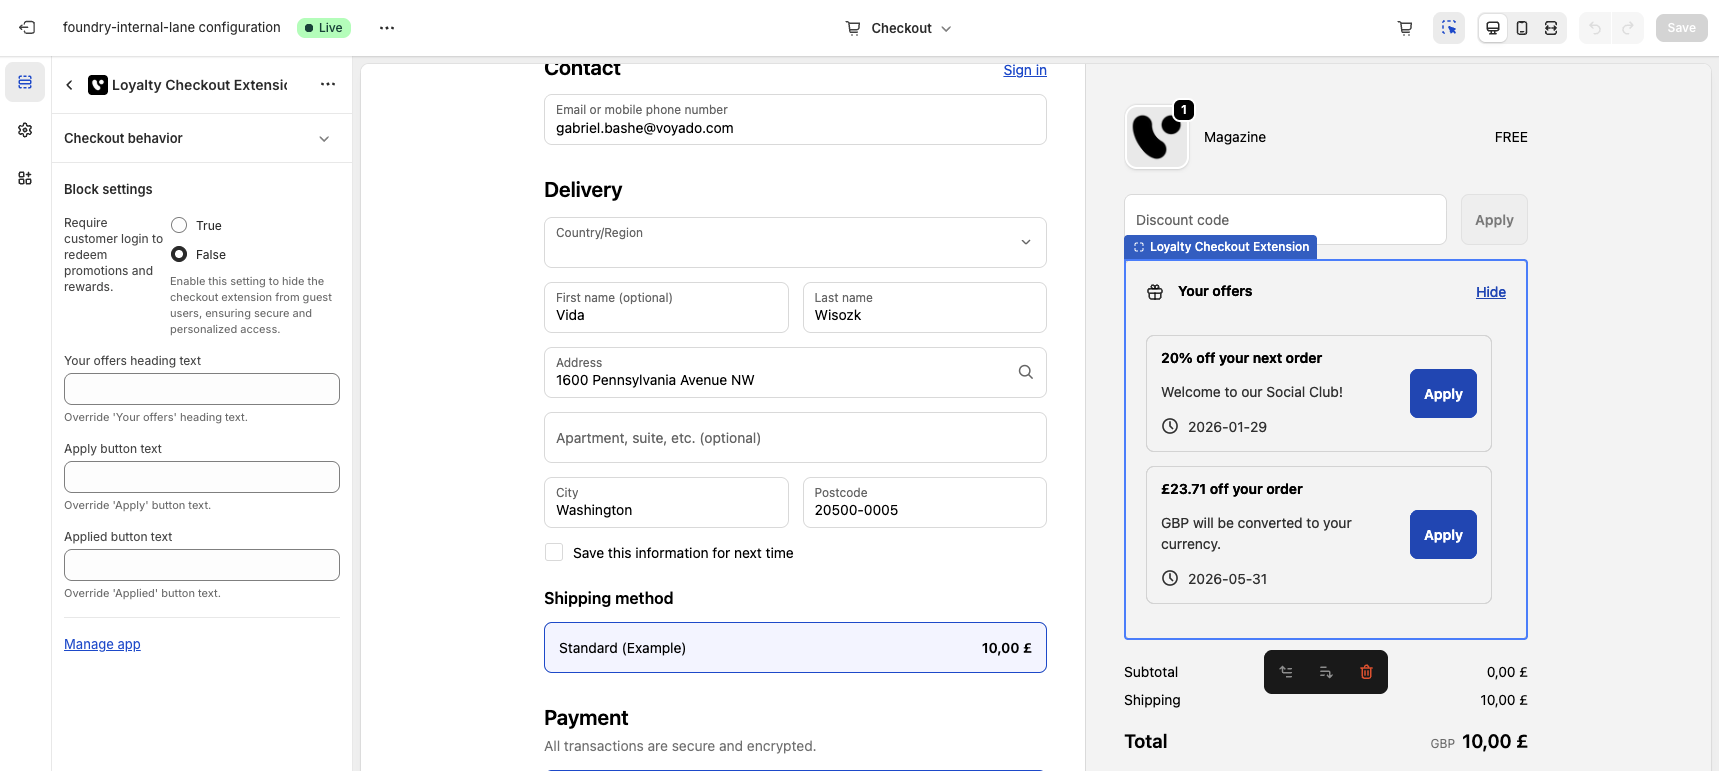
If you’re on Shopify Plus:- Go to Settings → Checkout → Customize.
- Add the Loyalty Checkout Extension (usually near the discount code field).
- Configure whether to require login in order to show offers.
- Configure label overrides (optional).
- Configure whether you show promotions, vouchers, or both (depends on which sync toggles are on).
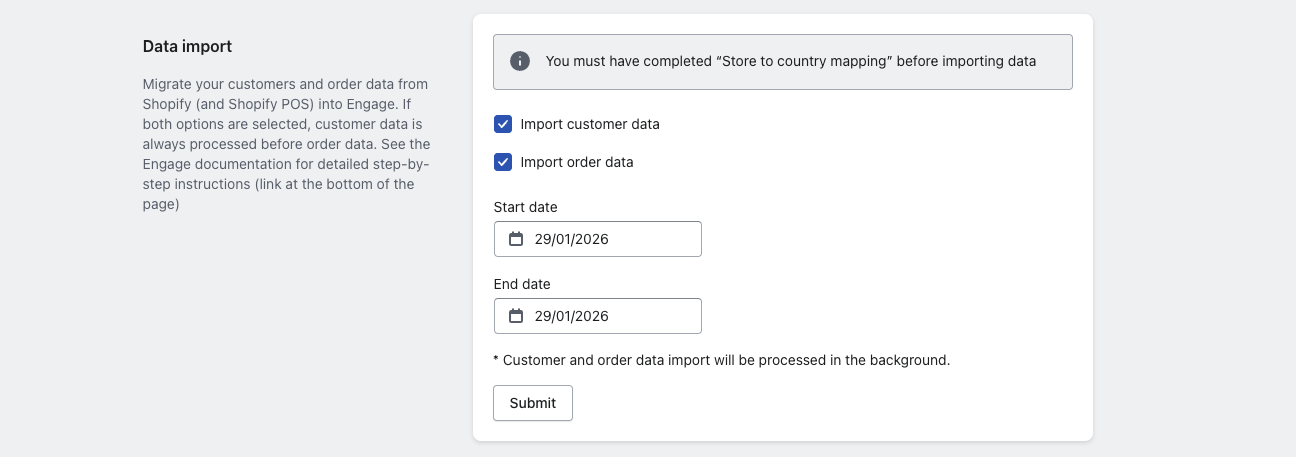
12 - Data import
In this step you will be importing existing customers and orders. If you’re onboarding an existing Shopify store, run these imports so that Engage starts with the full customer history. In Shopify, open Voyado Engage app → Data Import.Import customers
- Choose Import customer data and click Submit.
- All Shopify customers (including Shopify POS) are created in Engage if they don’t exist.
- If they do exist, the app just fetches their
contactIdand stores it in Shopify for future linking.
Import orders
- In the same screen, choose the date range (Start date / End date) for orders you want to migrate.
- Click Submit to import orders.
- Orders are imported only when their customer already exists in Engage (hence customers first).