Markets, countries and locales
In Shopify you can create markets for your store. Each market is a way to divide up your customers into useful segments in order to target specific countries or regions, or just to group countries and regions together to simplify your expansion efforts. Let’s say, for example, you create a market and call it “BeNeLux”:- Market: BeNeLux:
- Countries: Belgium, Netherlands, Luxembourg
- Languages: French (fr), Dutch (nl), German (de)
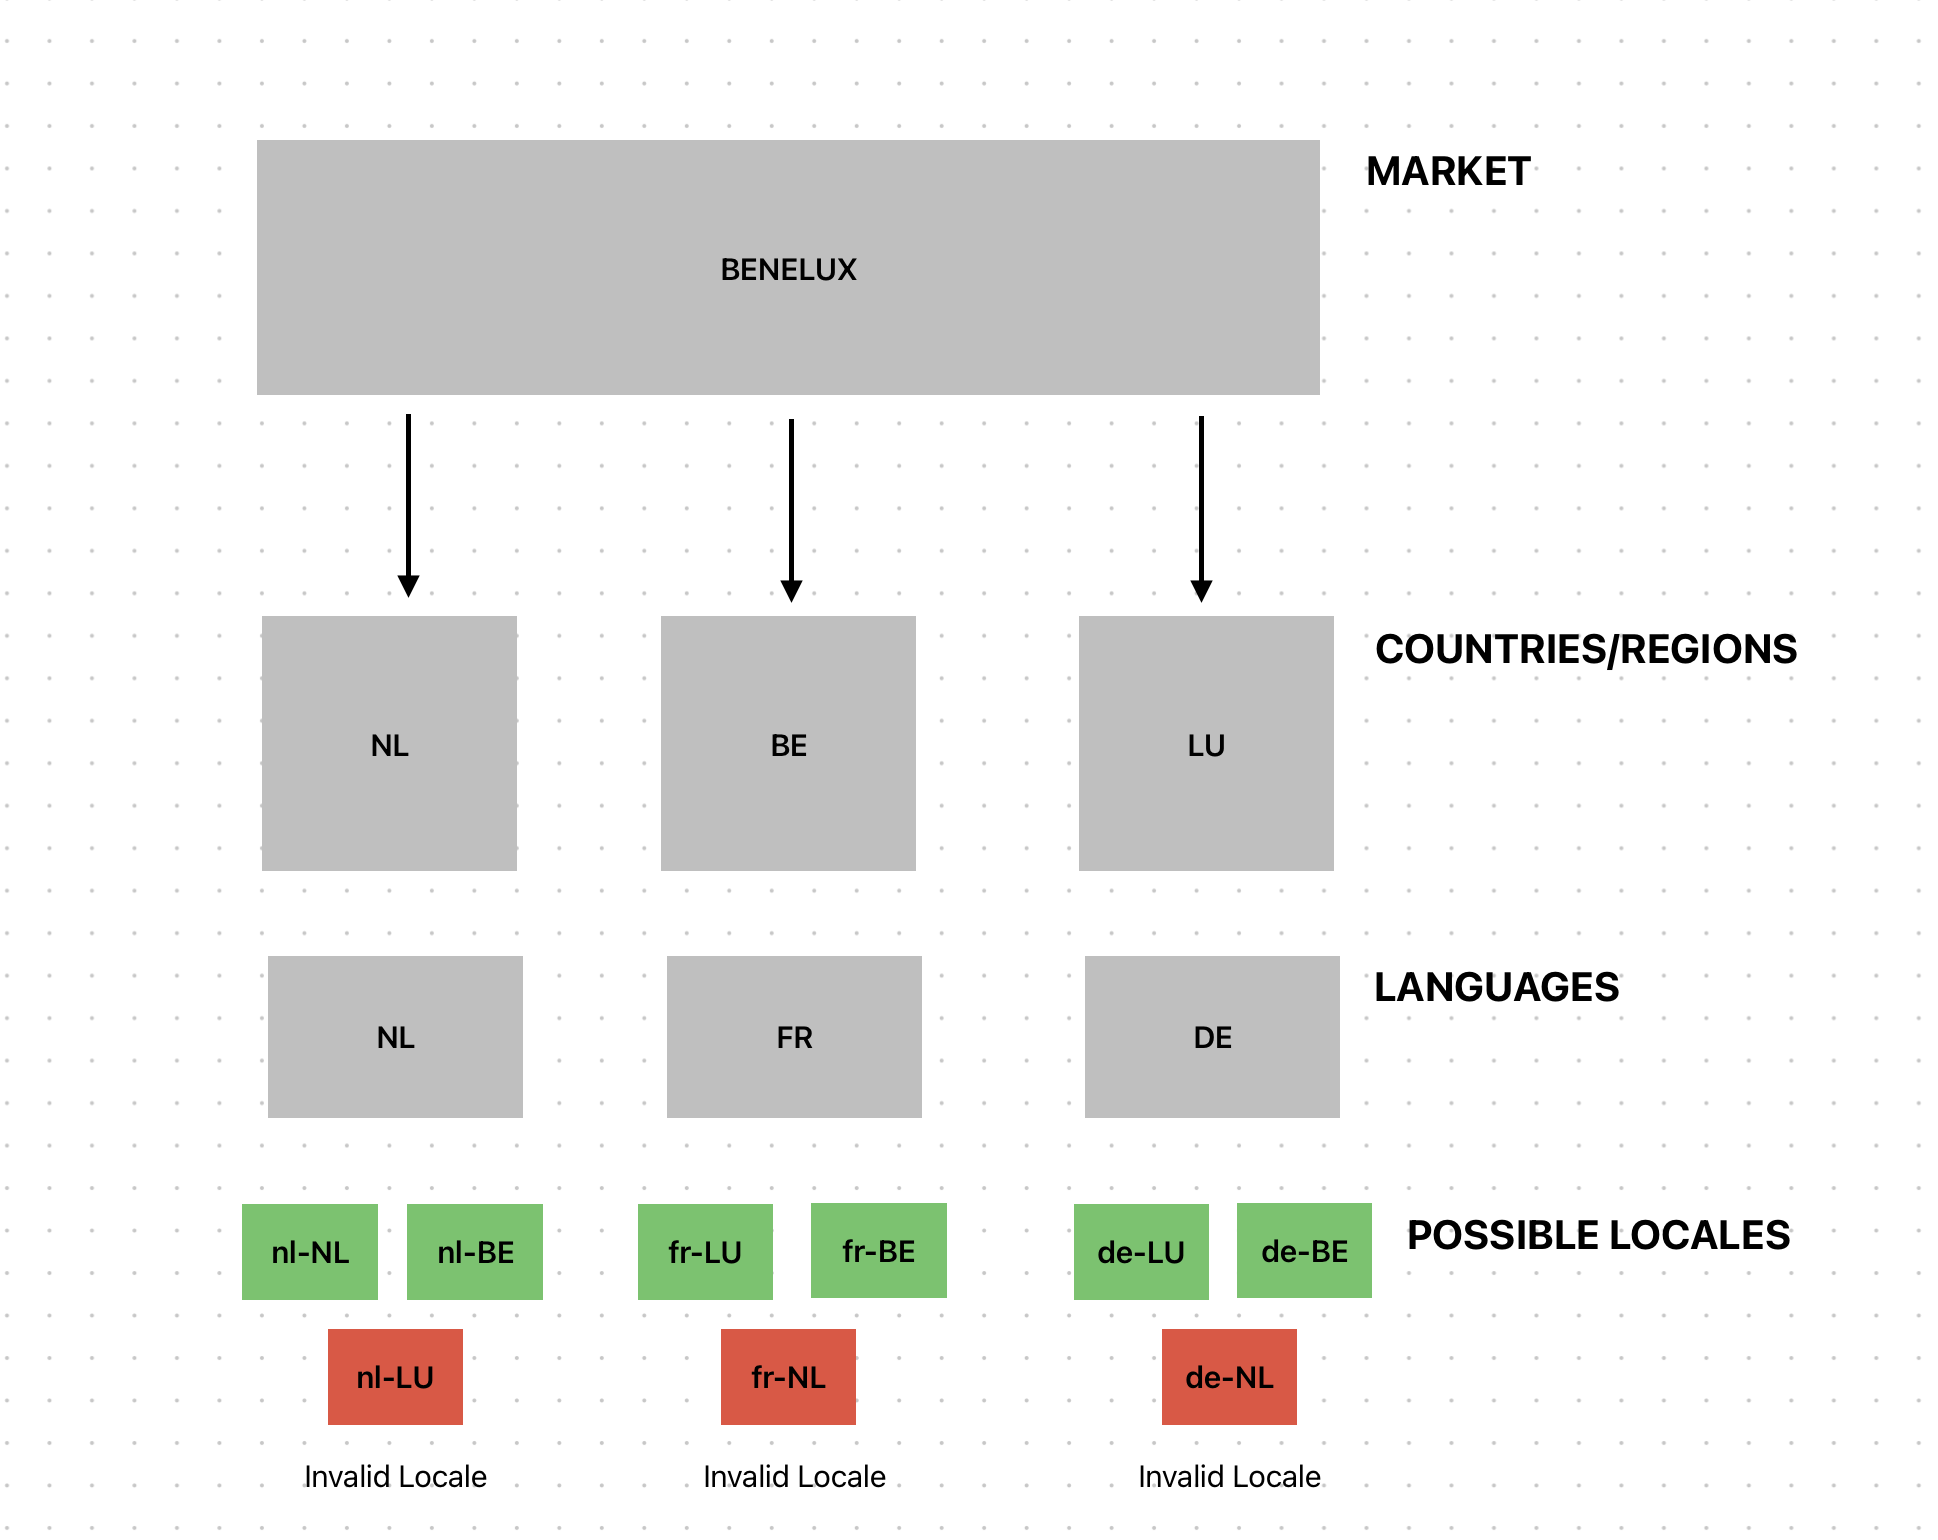
- fr-BE
- fr-LU
- nl-BE
- nl-NL
- de-BE
- de-LU
When using one Shopify store for all the countries you ship to
When using one Shopify store for all the countries you ship to
Imagine that you are a Shopify user selling to three different countries: Sweden, Netherlands and the UK. You have these shipping countries collected within the same Shopify store. When setting up the Voyado Engage app in Shopify, follow the steps below.First, you’ll need to create the stores in Voyado Engage:
- Log into Voyado Engage.
- In the left-hand menu, select “Administration” and then “Stores”.
- In the top right corner, select “New store“.
- Input your store’s details, for example:
- Store: “ecom SE“
- Time zone: “(+02:00) Europe/Stockholm“
- External Id: “ecom-se“
- Store type: “eCommerce“
- Active: “Yes”
- Select “Save” in the top right corner.
- You’ve created your Sweden store. Repeat step 3-5 for the Netherlands and the UK.
- Log into your Shopify store and access the “Voyado Engage“ app.
- Go to “Settings“ and the section “Voyado Store to Country Mapping“.
- Select “Add Mapping“.
- The mapping type should be “Shipping country“.
- In the “Voyado Store” drop-down list, choose the store you want to start mapping. In our current example, it’s the first of our three countries, Sweden, so choose the “ecom SE“ store.
- In the “Shipping Country“ list to the right, choose the country “Sweden“.
- Select “Save“ and the mapping should appear in the list.
- Repeat steps 3-7 for the Netherlands and the UK.
When using a separate Shopify store for each country you ship to
When using a separate Shopify store for each country you ship to
Imagine again that you sell to three different countries: Sweden, Netherlands and the UK. You have a separate Shopify store for each country. When setting up the Voyado Engage app in Shopify, follow the steps below.The first thing you have to do is create the stores in Voyado Engage:
- Log into Voyado Engage.
- In the left-hand menu, select “Administration” and then “Stores”.
- In the top right corner, select “New store“.
- Input your store’s details, for example:
- Store: “ecom SE“
- Time zone: “(+02:00) Europe/Stockholm“
- External Id: “ecom-se“
- Store type: “eCommerce“
- Active: “Yes”
- Select “Save” in the top right corner.
- You’ve created your Sweden store. Now repeat step 3-5 for the Netherlands and the UK.
- Log into your Shopify store for Sweden and access the “Voyado Engage“ app.
- Go to “Settings“ and the section “Voyado Store to Country Mapping“.
- Select “Add Mapping“.
- The mapping type should be “Shipping country“.
- In the “Voyado Store” drop-down list, choose the store you want to map. In our current example, it’s the first of our three countries, Sweden, so choose the “ecom SE“ store.
- In the “Shipping Country“ list to the right, choose the country “Sweden“.
- Tick the box “Rest of the world fallback“.
- Select “Save“ and the mapping should appear in the list.
- Now repeat steps 1-8 for the Shopify stores connected to the Netherlands to the the UK.